|
|
|
 The maille maker's handbook.........
or........
![]() Have you always had a facination with things
medieval, especially the ideal of knights in armour?
Have you always had a facination with things
medieval, especially the ideal of knights in armour?
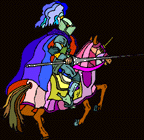
![]() Have you always had the deep seeded ( but carefully hidden) desire to suit up in full harness and
gallop across the field of honor upon a beautiful
warhorse,charging headlong into the amassed forces of death and
evil?
Have you always had the deep seeded ( but carefully hidden) desire to suit up in full harness and
gallop across the field of honor upon a beautiful
warhorse,charging headlong into the amassed forces of death and
evil?
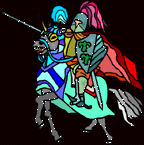
![]() Oh well,it's a nice fantasy,too bad you
don't own your own suit of armour,so that you could at least feel
the part on weekends or at ren faires. Nor do you know how to
make armour,and you may be afraid to try,thinking it to be too
hard to master.
Oh well,it's a nice fantasy,too bad you
don't own your own suit of armour,so that you could at least feel
the part on weekends or at ren faires. Nor do you know how to
make armour,and you may be afraid to try,thinking it to be too
hard to master.
not so,grasshopper..........
there are several types of armour that were used back in times of old:
Chainmaille is,perhaps,the easiest and least expensive form of armour to construct.
with wails of agony and gnashing of teeth,you say;"chainmaille?! with all those little rings to make,it's impossible!! It would cost too much! it's too hard!!"
ah, ye of little patience. maille is one of the easiest and least expensive types of armour that you ( yes,i said "you") can construct.
the hardest part is teaching yourself patience. It does take a while to weave all the links into actual armour,but believe me,the results well exceed the agony of waiting.
And your friend,talon,is here to show you the way!
O.K.,There are a few things you need to gather up first:
![]() the wire
the wire
The wire is ,obviously,the main ingredient of chain maille,and comes in different metals and thicknesses( called gauges). The type of metal used the most is steel,in what is known in either 14 or 16 gauge.( Important note: the higher the gauge number,the thinner the wire. 16 gauge is thinner than 14.)
Most armourers use the thinner 16 gauge wire for chainmaille hoods (known as coifs),as well as the mantles they attatch to the lower part of the hood. This is mainly because 16g. is lighter on the head,neck,and shoulders,and because the top of the head and the shoulders,not the maille links themselves,bear most of the weight of the hood.
The 14g. wire is used ,mainly, for chainmaille shirts ( also known as a hauberk or a byrnie) The 14 g wire is much stronger,which is nessesary because ,with the shirt,most of the weight is born by the links themselves. The shoulders are where the shirt rests,but only a small area of the links are physically supported by the shoulders. The rest just hangs straight down. Thus,the extra strength is required.
The least expensive,and easiest to get a hold of,is galvanized electric fence wire. You can usually get this at a local farm and ranch store ( example: Tractor Supply Company,McCoys,even Home Depot). The best way to purchase this wire is in the 1/4 mile rolls,usually running about \$28-$30 each. Trust me,this is more than enough wire for your beginning projects! It has a coating (the galvanization) that help resist rust,and is easily cleaned and polished.
Galvanized wire does get dull and develops a whiteish coating on it (oxidation),but it can be brought back to a shiny finish by polishing of some sort ( tumbling in a brass tumbler for loose links or small objects,a five gallon bucket filled with sand or polishing media and rolled on the floor for a while for much larger objects)
![]() The Turning jig
The Turning jig
Sound kind of scary,doesn't it? Don't let it frighten you,it just one of those words you don't hear often. The turning jig is just a simple device for changing the wire from a straight form into a spiral form (also know as a coil, or spring), and is simple to construct.
It consists of 2 main components: the mandrel,and the frame.
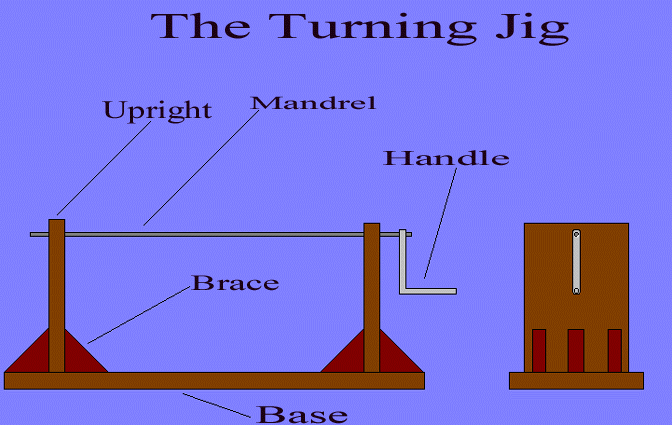
The mandrel is the part that the wire is actually turned on. It consists of a rod (metal or wood,metal is sturdier),with a handle attached to it (or if made of metal,the handle can be made from it by simple bending),and a small hole drilled into it near the handle.The mandrel is as wide as the internal diameter of the links you want to make. So if you want small links,don't get a one inch rod!
The base actually holds the mandrel while the wire is turned. It consists of a base,two uprights to hold the mandrel,and braces to hold the uprights steady (trust me ,this is important!) The uprights have a hole drilled into each of them to pass the mandrel through. Construction of the base is simple,just look at the picture and add screws!
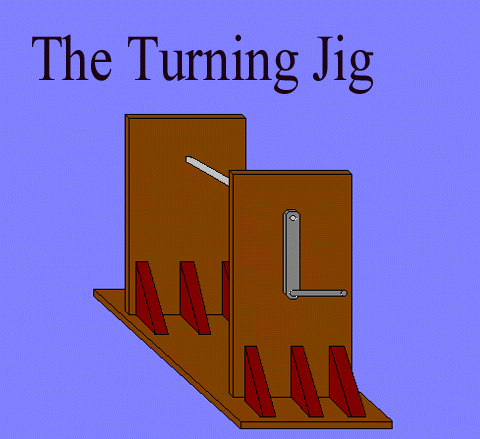
Now,this is another important note: The base needs to be as wide as possible. The turning of the wire creates a lot of torque,and if the base isn't wide enough,or the base isn't secured to a stable surface,it is a good possibility that the jig will flip,resulting in injury.
![]() the
tools
the
tools
You will need a bare minimum of three tools: 2 pair of needle nose pliers,and a cutter.The pliers are for the actual closing of the links,the thinner the nose the better (to a certain point).
Needle nose are used because you have a very small area to work with and in,and broad nose pliers just will not work well. Use one pair to hold the link,the other to do the closing.
As for the cutters,you do have several choices,but 8 inch bolt cutters have been determined to be the best cutter for the money. Diagonal cutters don't really have enough points of articulation to make an easy cut,plus the ends have a bad habit of breaking (I,personally,have destroyed two pair in this manner). A powered multi-tool ( Dremel,Ryobi,Black and Decker,ect.) is exceptional at leaving a good,clean cut,however,they do have several undesirable traits.
First off,they are LOUD! Family and neighbors have a bad habit of complaining of cutting going on at all times of the day or night. Second,the cutoff discs are expensive (a 5 pack of fibre-reenforced cutoff blades for the Dremel runs about \$8!). Third,the discs grind down entirely too quickly,leave too much metal and abrasive dust,and throws sparks like crazy! Fourth, the cut actually leaves a small gap,so that when the link is closed,it does not close into a perfect circle ( this is the ideal). Fifth,multi-tools require electricity ,meaning you will have to be close to an outlet to operate one,or you will have to make sure the batteries are charged up (I do much of my cutting in the car,waiting to pick up my children at school,or in my chair while I'm watching the History Channel).
Eight inch bolt cutters aren't perfect. The rivits have a bad habit of loosening a litttle after several thousand links,but just a little peening fixes that. You do have to oil the joints periodically,but this is a small price to pay. The cutters usually have at least five points of articulation,helping multiply the force exerted in the cut,and are spring loaded,helping to cut down on fatigue from having to constantly re-open the cutters after every cut. The cut itself isn't flush,but on the upside,the opposite ends of the link fit togather just like pieces to a puzzle. You can find these bolt cutters at any hardware store (I found mine at Wal-mart,costs about \$4-$7,depending on the brand. If you can find them,get the Popular Mechanics brand,they have a lifetime guarantee).
![]() The
gloves
The
gloves
Now,get yourself the cheapest pair of leather gloves you can find. This is an important step. They will cut down on friction on the skin,preventing blisters. They will help keep any residue from the wire off your skin,keep your skin from getting pinched if you loose consentration and overturn a coil (turning the wire back over the coil,it can hurt like the dickens,and leave a nasty blood blister),and will act as an extra layer of protection if you let go of the jig handle before you cut the coil loose (when you turn the wire,a lot of potential energy is stored in the coil. Letting go of the handle before cutting the coil loose from the wire source will result in the handle spinning back around in the opposite direction of the turning,sereal times,at a high rate of speed,right back onto your wrist. The extra layer of protection the gloves give helps to prevent,or at least minimize any injury).
Now that we have the basic items needed for maille making gathered,click on to page two for the next steps!!